> For the complete documentation index, see [llms.txt](https://docs.mercuri.cx/llms.txt). Markdown versions of documentation pages are available by appending `.md` to page URLs; this page is available as [Markdown](https://docs.mercuri.cx/features/ai-assistants/how-to-add-ai-agents-to-your-business-in-mercuri-cx.md).
# How to Add AI Agents to Your Business in Mercuri CX
Mercuri CX allows businesses to enhance their customer communication using AI-powered agents that can respond to customer queries on WhatsApp and SMS. Here’s how you can set it up in just a few steps.
**1. Navigate to the AI Agents Section**
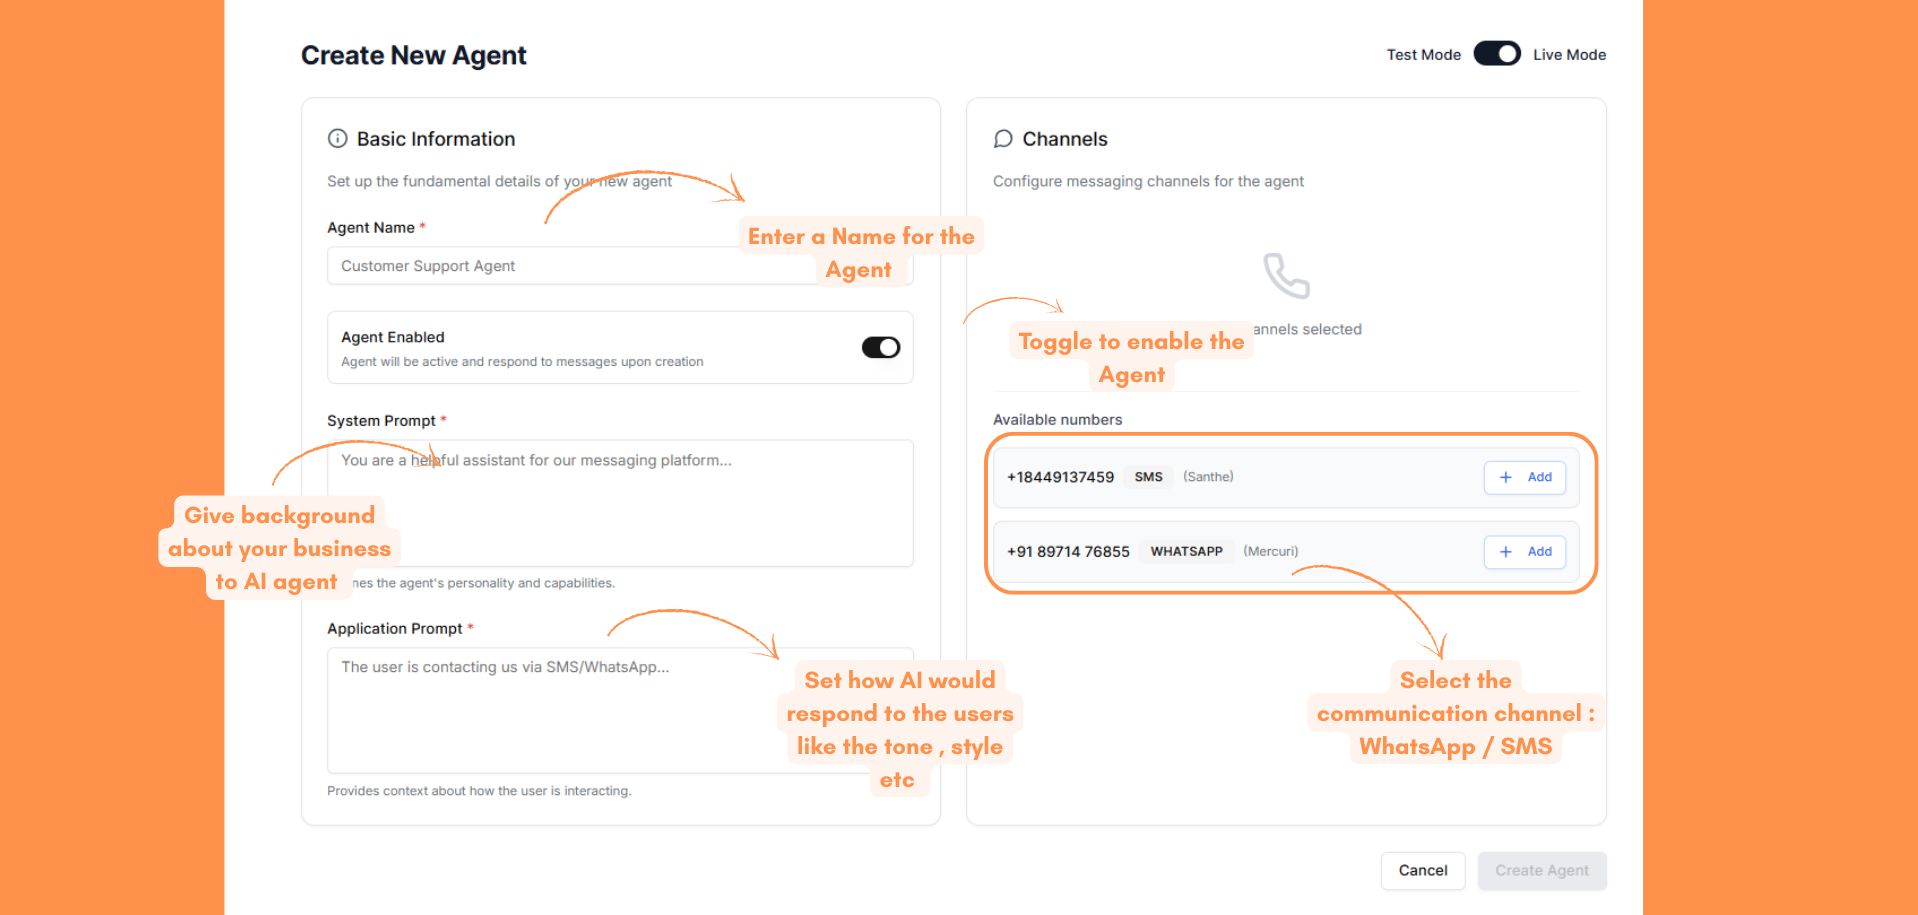
From your Mercuri dashboard sidebar, click on **“AI Agents”** → then click **“Create”** to add a new agent.
**2. Fill in the Basic Information**
* **Agent Name**: Give your AI agent a name that reflects its purpose (e.g., "Customer Support Agent", "Order Assistant").
* **Agent Enabled**: Toggle this ON if you want the agent to start responding immediately after creation.
**3. Define the Prompts**
* [**System Prompt**:](https://docs.mercuri.cx/features/ai-assistants/pages/fWSdxSsixsJ2bmFP72eb#id-1.-what-is-a-system-prompt) This prompt gives the AI the background about your business
* [**Application Prompt**:](https://docs.mercuri.cx/features/ai-assistants/pages/fWSdxSsixsJ2bmFP72eb#id-2.-what-is-an-application-prompt) This prompt tells the AI on how it should respond to the customers. In this prompt, we define the tone , style and behavior of the AI agent
**4. Assign Messaging Channels**
* Under the **“Channels”** section on the right, choose the number (WhatsApp or SMS) the agent should respond on.
* Click **“+ Add”** next to the appropriate number
**5. Choose Mode**
At the top right, switch between:
* [**Test Mode**:](/features/ai-assistants/how-to-add-ai-agents-to-your-business-in-mercuri-cx/what-are-test-and-live-mode.md#what-is-test-mode) For trial and training purposes.
* [**Live Mode**: ](/features/ai-assistants/how-to-add-ai-agents-to-your-business-in-mercuri-cx/what-are-test-and-live-mode.md#what-is-live-mode)For real-time conversations with customers.
> **Tip**: You can start in Test Mode to validate the agent’s responses before going live.
**6. Click “Create Agent”**
Once everything is filled in and channels are selected, click the **“Create Agent”** button at the bottom right to activate your AI agent.