# Cómo instalar Mercuri para WooCommerce

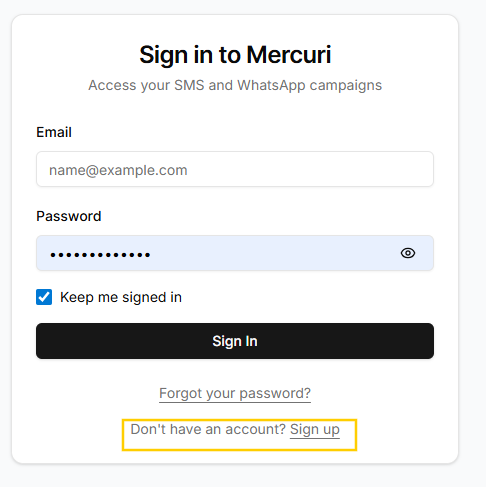
1. Ve a [**https://client.mercuri.cx/**](https://client.mercuri.cx/)
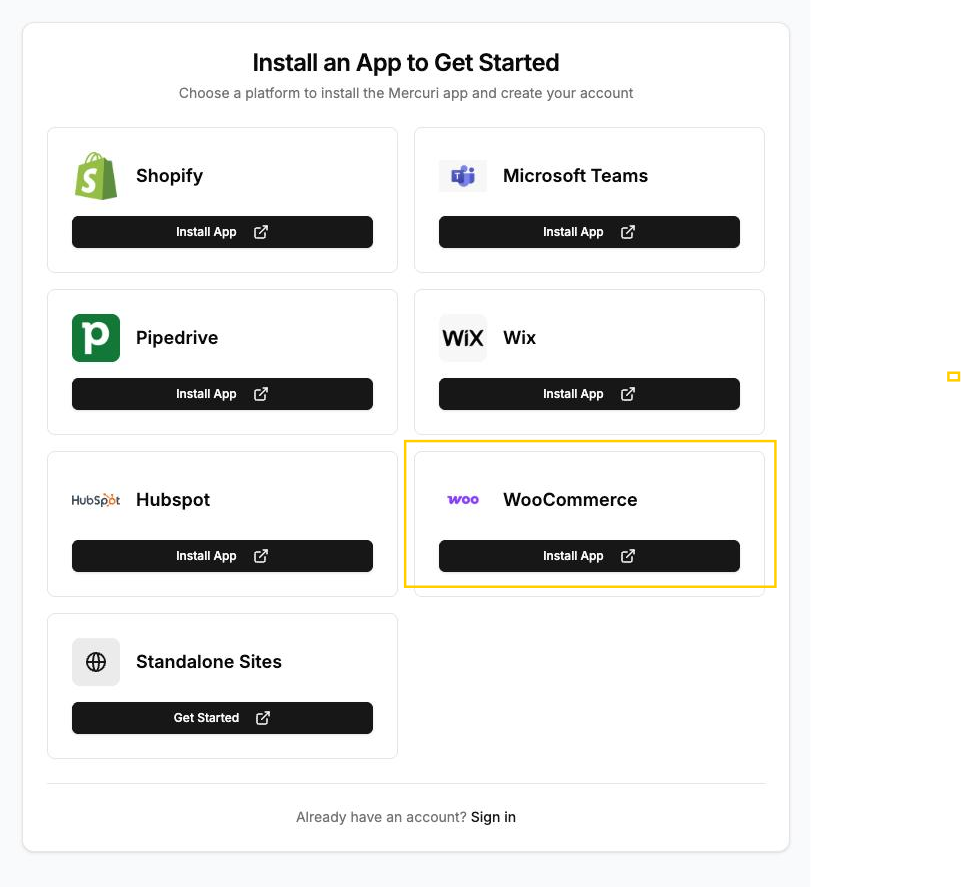
2. Haz clic en la opción **“Sign up”** en la parte inferior.

<figure><img src="https://392978341-files.gitbook.io/~/files/v0/b/gitbook-x-prod.appspot.com/o/spaces%2FsZtOBCP9JV8XEWJpUU4t%2Fuploads%2F2CHSgzFNhZM4LytYhbqY%2Fimage.png?alt=media&#x26;token=5bd6821b-2830-45de-8c70-1601c184b684" alt="" width="365"><figcaption></figcaption></figure>

3. Desde la lista de plataformas, selecciona **WooCommerce** para comenzar el proceso de instalación.

<figure><img src="https://392978341-files.gitbook.io/~/files/v0/b/gitbook-x-prod.appspot.com/o/spaces%2FsZtOBCP9JV8XEWJpUU4t%2Fuploads%2FMcSF195TQjaux4iMfs3g%2Fimage.png?alt=media&#x26;token=fbbb1e73-b5a6-434f-a135-2e2ddb108556" alt="" width="375"><figcaption></figcaption></figure>

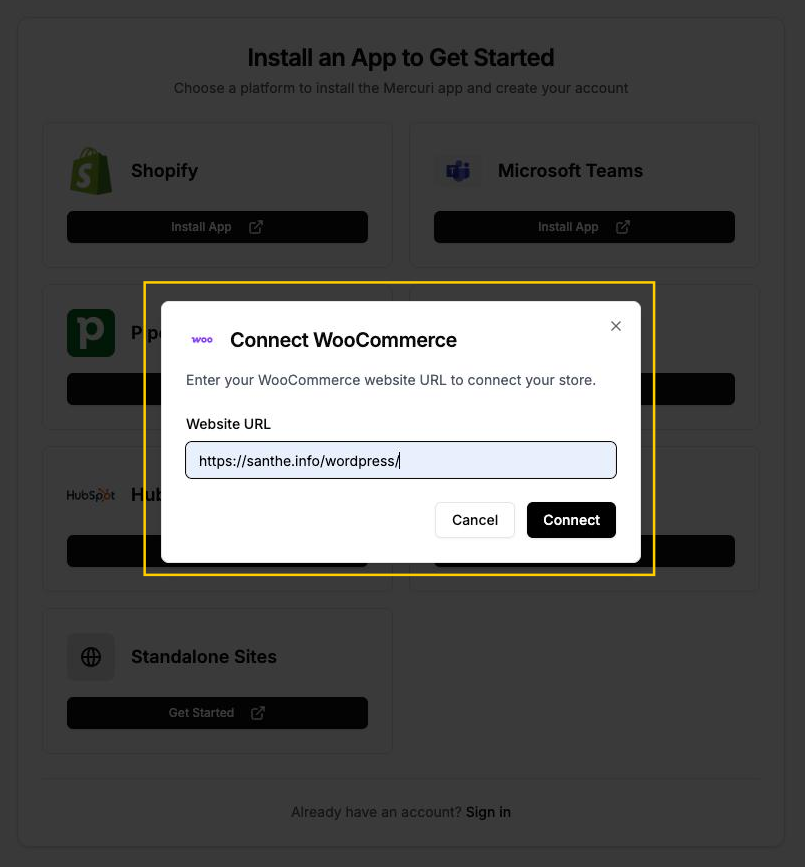
4. Se te pedirá ingresar la **URL de tu sitio web de WooCommerce**.\
   Introduce la URL de tu tienda y haz clic en **Connect**.

<figure><img src="https://392978341-files.gitbook.io/~/files/v0/b/gitbook-x-prod.appspot.com/o/spaces%2FsZtOBCP9JV8XEWJpUU4t%2Fuploads%2FmKsAagycfas7rCzYGTE2%2Fimage.png?alt=media&#x26;token=6d044c98-c540-48c5-97d1-f8930091769f" alt="" width="375"><figcaption></figcaption></figure>

5. Después de hacer clic en **Connect**, serás redirigido a la pantalla de inicio de sesión de WooCommerce, donde Mercuri solicitará permiso para conectarse a tu tienda.

   En esta página:

   1. Ingresa tu **usuario o correo electrónico de administrador de WooCommerce.**
   2. Ingresa tu **contraseña.**
   3. Haz clic en **Login** para continuar.

<figure><img src="https://392978341-files.gitbook.io/~/files/v0/b/gitbook-x-prod.appspot.com/o/spaces%2FsZtOBCP9JV8XEWJpUU4t%2Fuploads%2FJKeQsDT817miG0PAcONt%2Fimage.png?alt=media&#x26;token=903b6d56-4ac3-4c6f-bebe-2c199c40f906" alt="" width="368"><figcaption></figcaption></figure>

6. WooCommerce mostrará una pantalla solicitando permisos de acceso para Mercuri.\
   Haz clic en **Approve**.

<figure><img src="https://392978341-files.gitbook.io/~/files/v0/b/gitbook-x-prod.appspot.com/o/spaces%2FsZtOBCP9JV8XEWJpUU4t%2Fuploads%2FKpnJGraEkkHAeYVQnaQt%2Fimage.png?alt=media&#x26;token=de2f881e-2672-4941-8e6b-b1b207b05f2b" alt="" width="350"><figcaption></figcaption></figure>

7. Después de aprobar, serás redirigido a la página de instalación.
   * Haz clic en **Install App**.
   * Revisa los permisos requeridos y haz clic en **Allow and Install**.
8. Después de instalar la app, regístrate para obtener una **cuenta de Mercuri** si aún no la tienes.
9. **Configura un número de teléfono:**
   1. Agrega un número de teléfono a tu cuenta Mercuri para comenzar a enviar y recibir mensajes.
   2. Ve a **Settings > Channels > SMS** en Mercuri y completa el proceso de configuración de SMS.
      * Aquí tienes el enlace para comenzar: <https://docs.mercuri.cx/sms-integration>
   3. Ve a **Settings > Channels > WhatsApp** en Mercuri y completa el proceso de configuración de WhatsApp.
      * Aquí tienes el enlace para comenzar: <https://docs.mercuri.cx/whatsapp-integration>

---

# Agent Instructions: Querying This Documentation

If you need additional information that is not directly available in this page, you can query the documentation dynamically by asking a question.

Perform an HTTP GET request on the current page URL with the `ask` query parameter:

```
GET https://docs.mercuri.cx/mercuri-docs-es/guia-de-integracion/woocommerce/como-instalar-mercuri-para-woocommerce.md?ask=<question>
```

The question should be specific, self-contained, and written in natural language.
The response will contain a direct answer to the question and relevant excerpts and sources from the documentation.

Use this mechanism when the answer is not explicitly present in the current page, you need clarification or additional context, or you want to retrieve related documentation sections.